
I love love, LOVE classic vintage stuff. Who doesn’t? I kinda wish I lived during the 40′s. Or at least had their fashion today because I do love my high tech stuff… and the internet. hehe
ANYWAYS, I think birdcage veils are so timeless and sexy. Wear one for a vintage themed photo shoot, dress up in 40′s attire and wear one for Halloween, or make one for your wedding…. or be really brave and wear it just because. hehe!
First, I looked at some tutorials online… tried them… then they didn’t work for what I was wanting to achieve. I tried this tutorial, but it was way too puffy on top for me, and I wanted a dramatic, short veil. So here’s what ended up working for me after some trial and error…
This veil is a bandeau style veil – this means that it secures with two pins or combs, rather than one. I prefer the bandeau style because you have more control over how it sits on your face and head (I wanted one that lays flatter against my face, rather than being really poofy). It also allows you to play with angles. You could easily adjust the length of the veil to your liking.
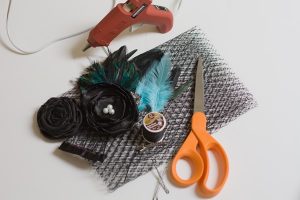
Here’s all the stuff I needed for mine:
1/2 yard of Russian netting (usually comes in 9″ or 18″ widths)
(I ordered the 18″ width even though the length of my veil is 9″ because I can get 4 veils out of 1 yard rather than 2 veils out of 1 yard of the 9″ netting)
Thread in matching color
Needle
2 bobby pins (or small hair combs, if you prefer)
Scissors
Supplies for separate flower embellishment:
Handmade satin flower
Feathers
Alligator clip
Black felt
Hot glue gun
I got my netting and feathers from Etsy. I purchased my netting from GS Boutique and the feathers from Plumule… though there are lots of other suppliers on Etsy, so just search for Russian netting or feathers under the supplies category.
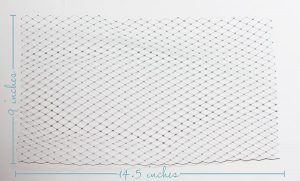
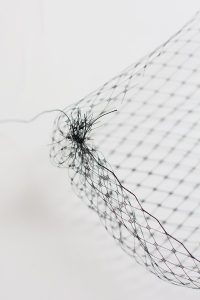
1. Cut a rectangle of netting approximately 9 inches by 14.5 inches, with the finished edge along the bottom long side (you may want to cut it slightly wider and test it against your face before you continue in case you need more netting – this was the perfect size for me).
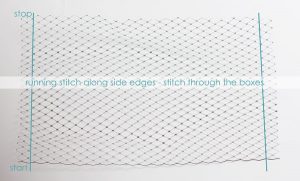
2. Sew a running stitch along both of the side edges, stitching through the boxes where the diamonds meet. I stitched a little bit from the edge so I’d have a little extra for when I attached the netting to my bobby pins.
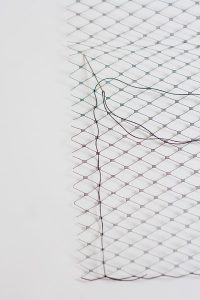
3. Hold one edge of the thread and scrunch the netting towards the opposite end. Then sew a few stitches through it to secure it.
4. Thread the end through the end of a bobby pin (or sew it onto a comb if you decide to use combs).
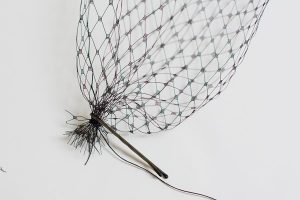
Take the extra bit on the end and wrap it around the bottom of the bobby pin and sew the loose ends to the bottom of the veil just next to the pin. (does that make any sense?) lol

5. Repeat for the opposite side.
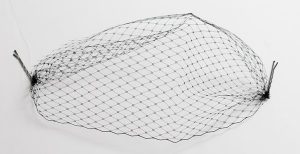
And there’s your veil! Next, create your embellishment and attach it to an alligator clip.
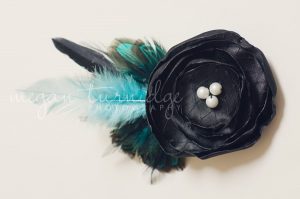
This is the clip I made. I made the flower using this tutorial. Then I cut a circle of black felt and hot glued the feathers to it and then glued the flower on top of that. I hot glued the bottom of the felt piece to my alligator clip. And that was it!
The finished veil:
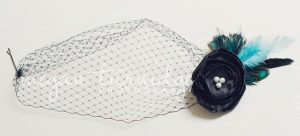
Pretty awesome, right? Especially considering it cost me a little less than $10 to make it and these go for $50 or more on Etsy!